From your computer, you first need to connect to Diamond’s Linux system. You can do so by installing NoMachine with further details here: https://www.diamond.ac.uk/Users/Experiment-at-Diamond/IT-User-Guide/Not-at-DLS/Nomachine.html
Connect to DLS Linux via NoMachine and open a Firefox web browser and in the address bar enter: https://jupyterhub.diamond.ac.uk/
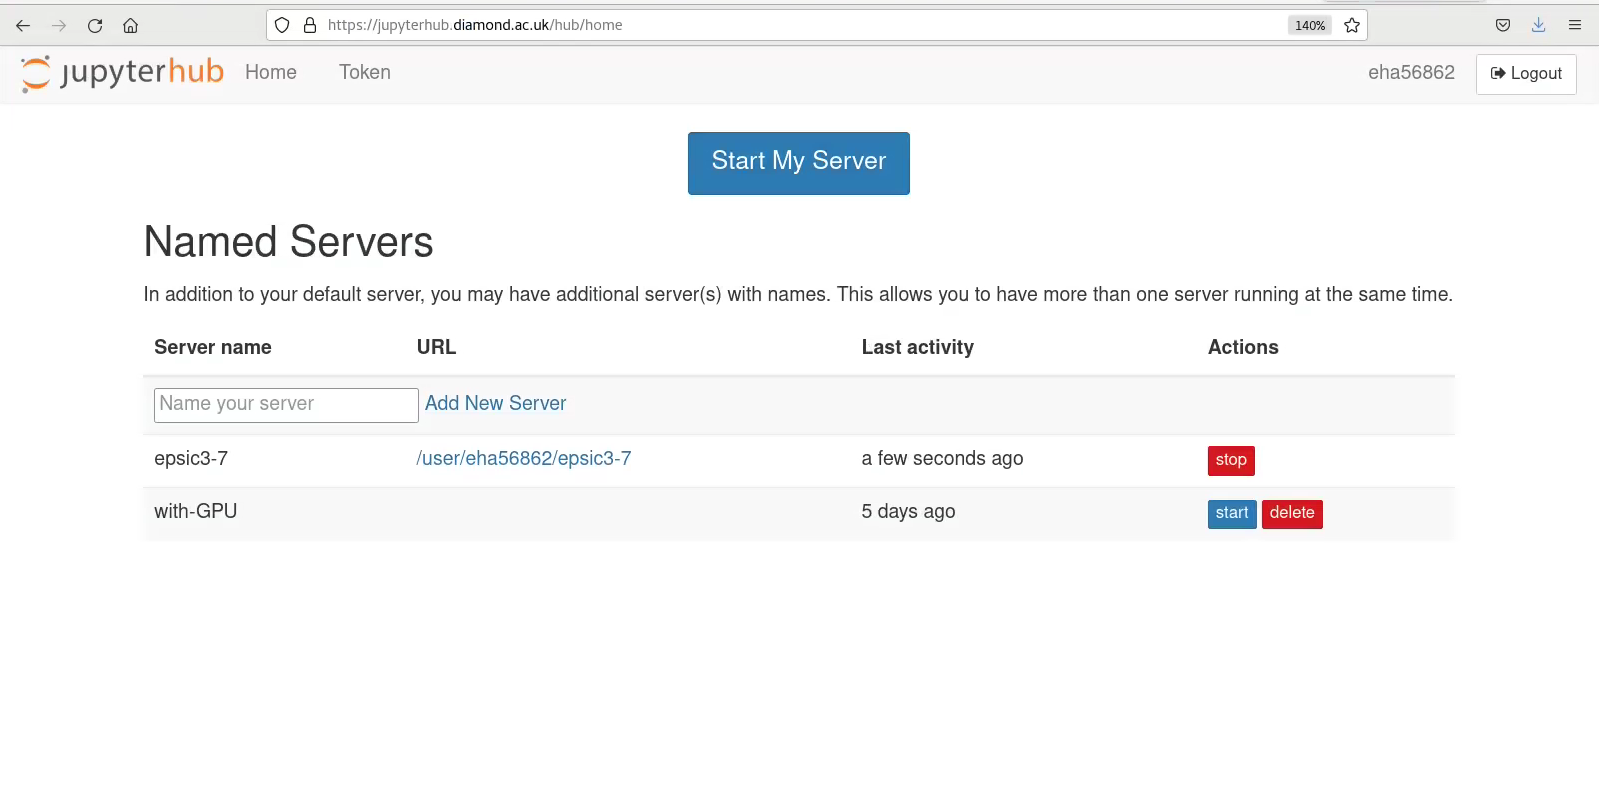
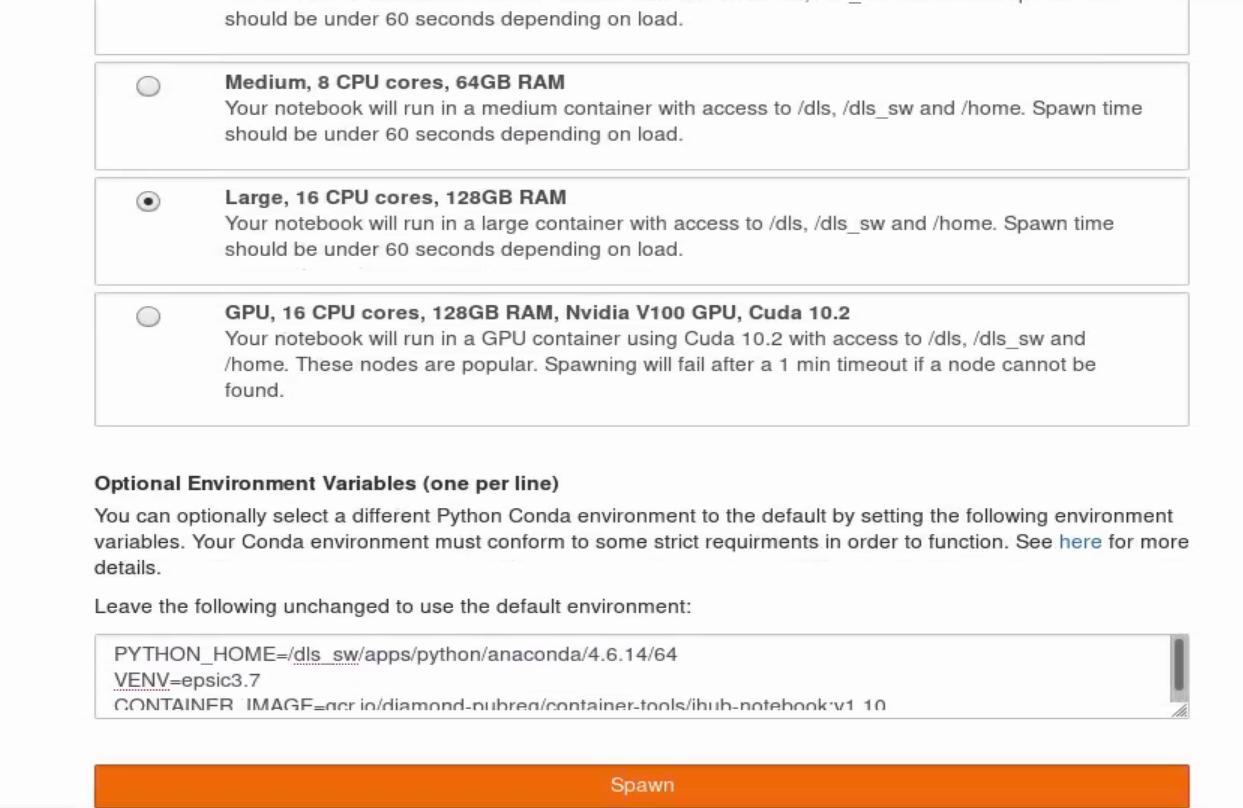
After logging in you should see an interface like the first screenshot on the right hand side. You can choose between different resource capacities for your jupyter notebook to useProvide a name for your server and press Start.
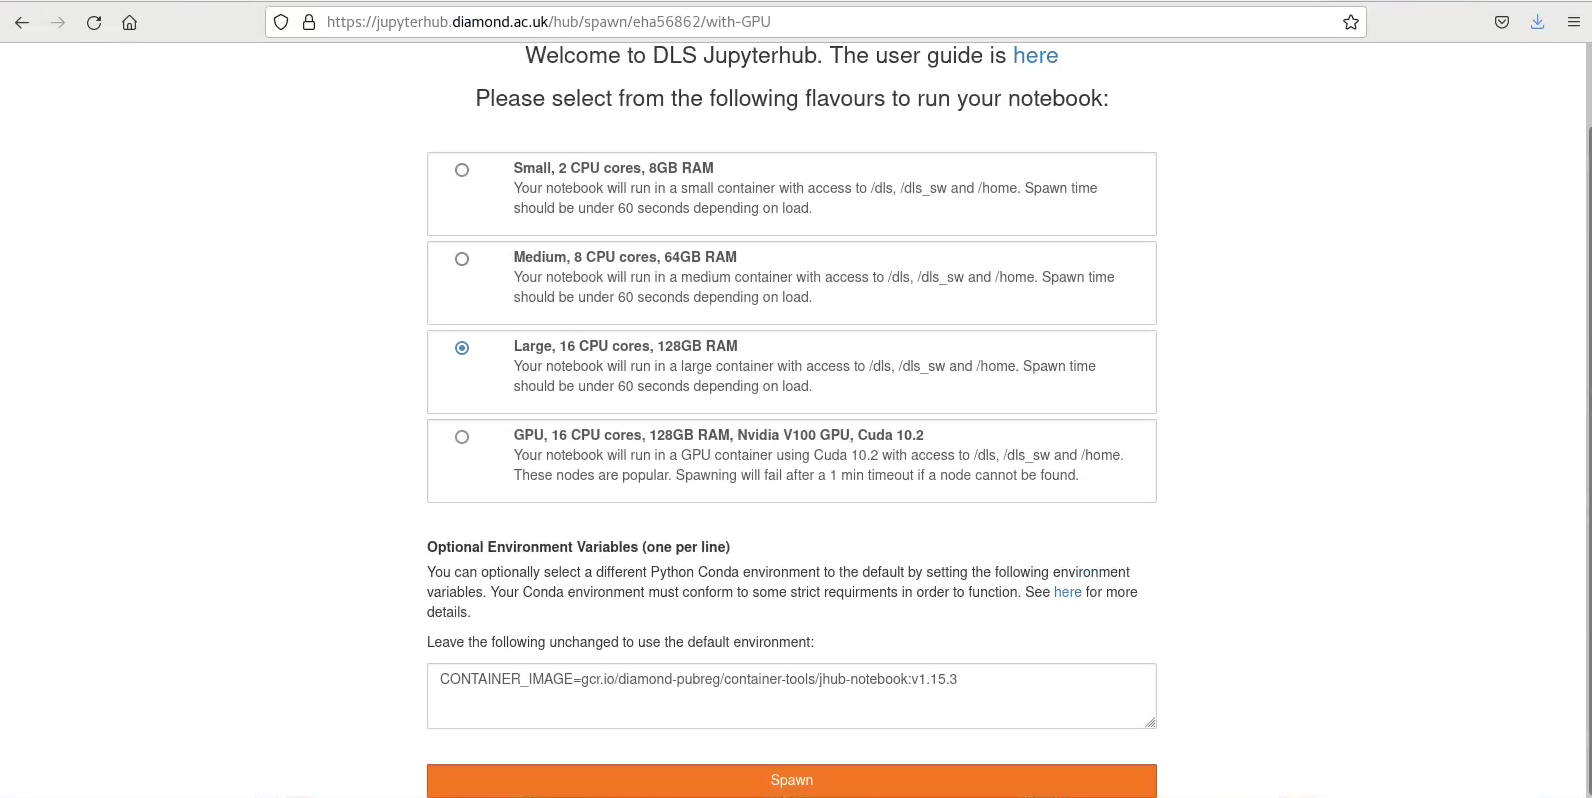
In order to connect to the python environment specific to ePSIC, you have to edit the window below the resource selection tabs. The default value for VENV is jupyterhub-dls which you need to edit to epsic3.7 (see second screenshot)the next window, select the level of resource needed for your server (typically we use 128 GB RAM option for 4D-STEM data), then press Spawn.
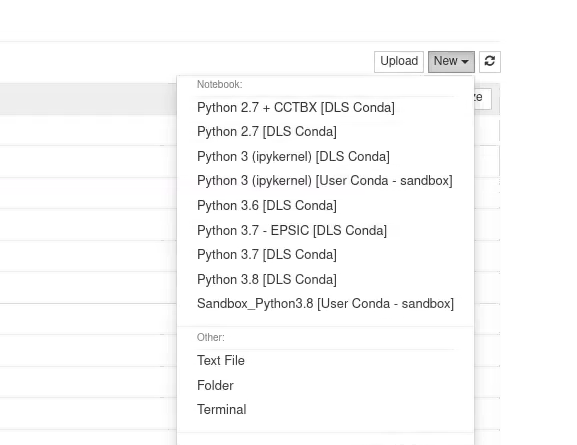
After pressing Spawn button with the selections selection above Jupyter interface will be opened at your /Home directory. You can either open a new notebook by pressing New drop down menu on the upper right hand side and selecting Python 3, or opening an existing notebook (e.g. ones you have downloaded from ePSIC’s Github page - https://github.com/ePSIC-DLS/User-Notebooks ).
. You need to set the kernel to Python 3.7 - EPSIC to get access to ePSIC’s conda environment.