Batch 2D Powder Diffraction Data Reduction - Processing Perspective [DAWN 1.7.1]
Video
Building a processing pipeline to integrate 2D powder diffraction images
The data reduction process requires saved calibration parameters from a previous analysis. If you don't have these perform a calibration first by following the tutorials here.
In this example we will take a single powder diffraction image, import calibration metadata, integrate the image to intensity vs q, then export that data to ASCII.
- Start DAWN and open the Processing Perspective (Window Menu, Open Perspective, Other, Processing)
- Open the data you wish to process (either using the File Menu, Open File To Process or double clicking from the Project Explorer and File Navigator views, or dragging and dropping a file from your operating system file navigator into the Data Slice View)
- For this example we use pow_M99S5_1_0001.cbf included in DAWN as example data
- A dialog will appear allowing you to set up how the data is sent to the pipeline
- In this case use the default (image-01 is the dataset, and the data will be processed as images). If you are processing data from a NeXus file there will be multiple datasets to choose from. Select the correct dataset and dimensions in the table, make sure all other dimensions are set to Type = Range with a value all to process all images. Sub selections of data can be chosen by selecting Type to equal Range but specifying the range in numbers i.e. 0:10.
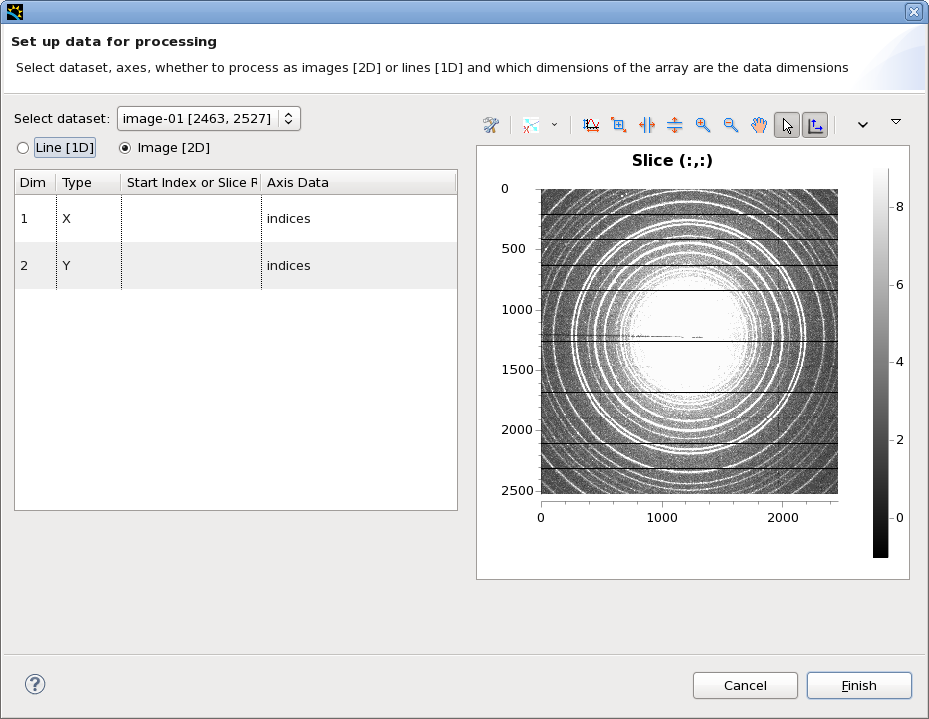
- Click Finish when you are happy with you data setup
- The file name should appear in the Data Slice View, with the Current slice information (only a single image in this case), and the raw data should appear in the input plot.
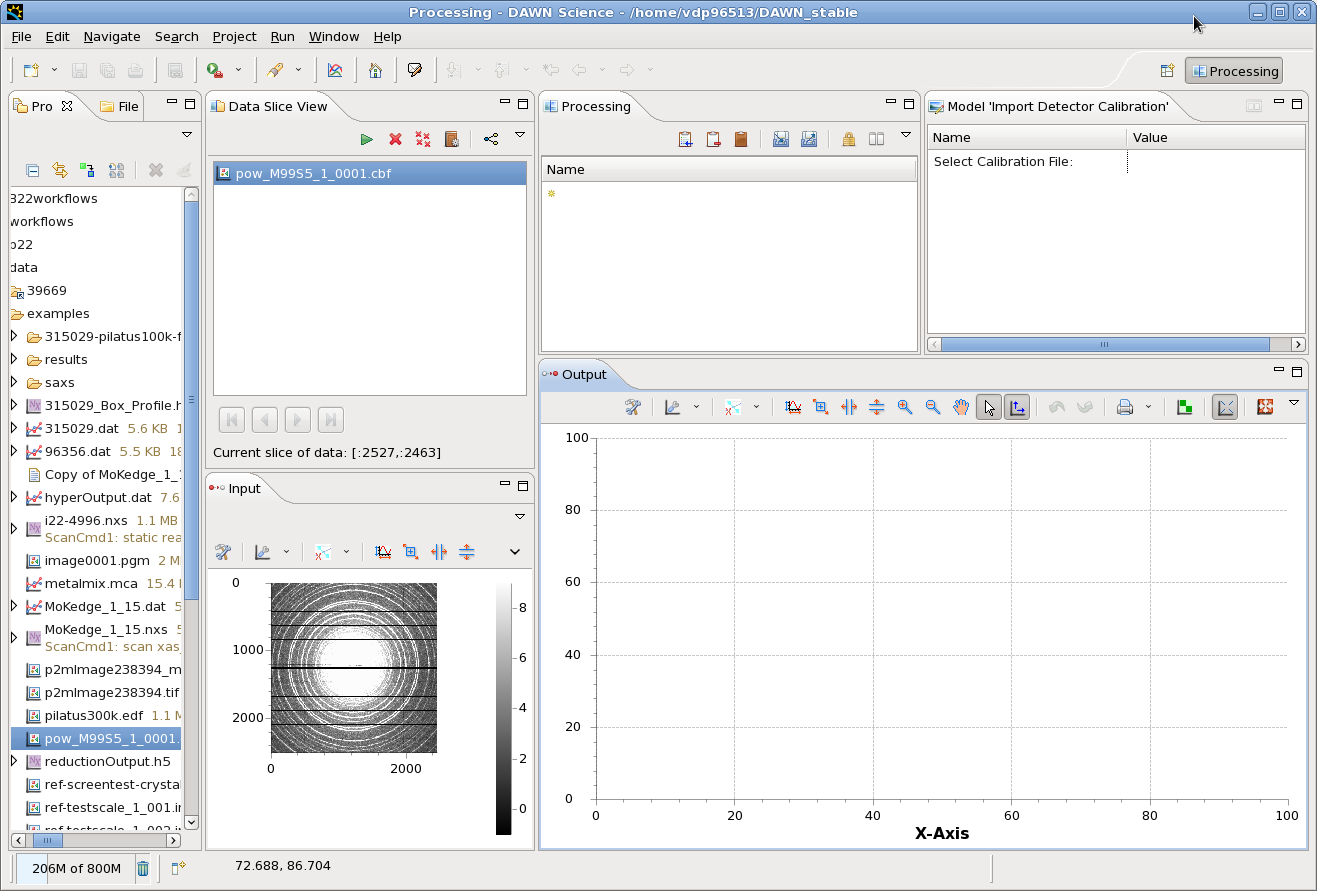
- The Processing view can now be used to build up the pipeline
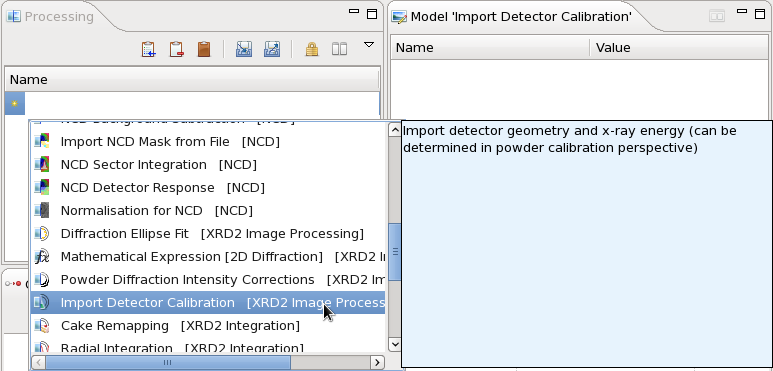
- Click on the yellow star in the processing table
- A drop down list of all the processing steps suitable for image data will appear
- Select Import Detector Calibration from this list
- The Import Detector Calibration step will now appear in the Processing tables, with a warning that the file does not contain metadata (because no file is selected)
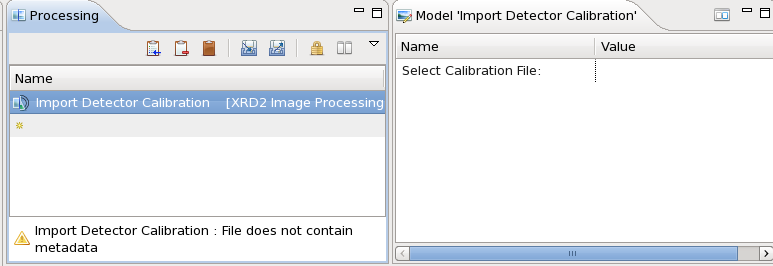
- When a processing step is selected, the Model view shows all the parameters that can be set for that processing step.
- Set the value of Select Calibration File: to your calibration file (if you don't have one first create one in the powder diffraction perspective)
- This can be done by using the navigator icons that appear when you click in the Value column, or by drag-dropping the file directly into the value column
- When a valid calibration file is entered click again on Import Detector Calibration to update the pipeline
- The warning should vanish and the raw data should appear in the output window

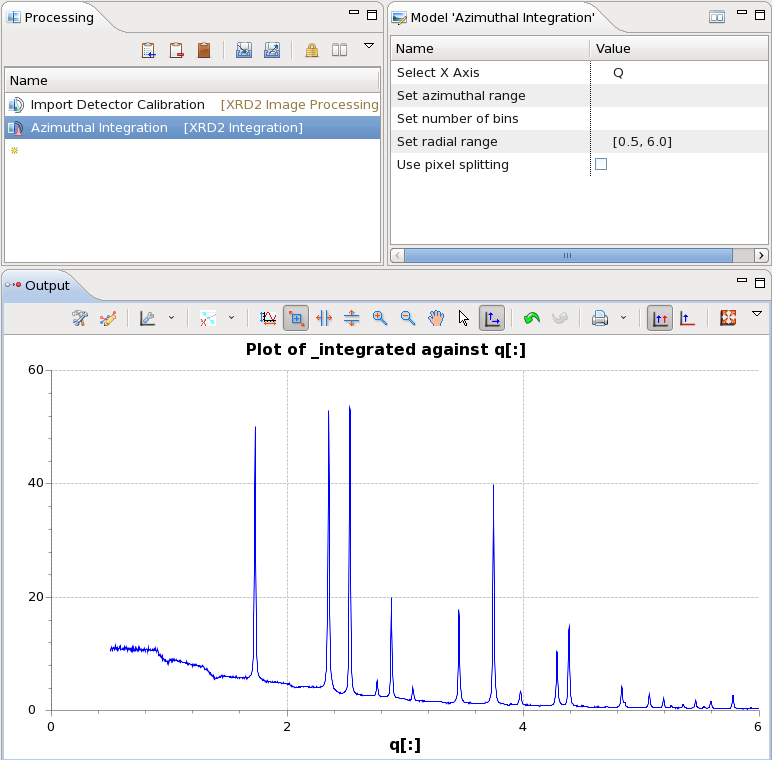
- Now the image has calibration metadata, integration routines can be used to convert the data to a 1D pattern
- Click the yellow star again and select Azimuthal Integration
- The Output plot now shows the integrated 1D pattern, reduced using the default settings

- Again, the Model view can be used to adjust the parameters of the integration routine (set axis as 2 Theta, q, d-spacing, pixel, number of bins, radial and azimuthal ranges and whether to use the pixel splitting algorithm)
- Enter 0.5, 6.0 in the radial range box, and click on the Azimuthal Integration step to update the pipeline
- The Output plot should now show the reduced q range
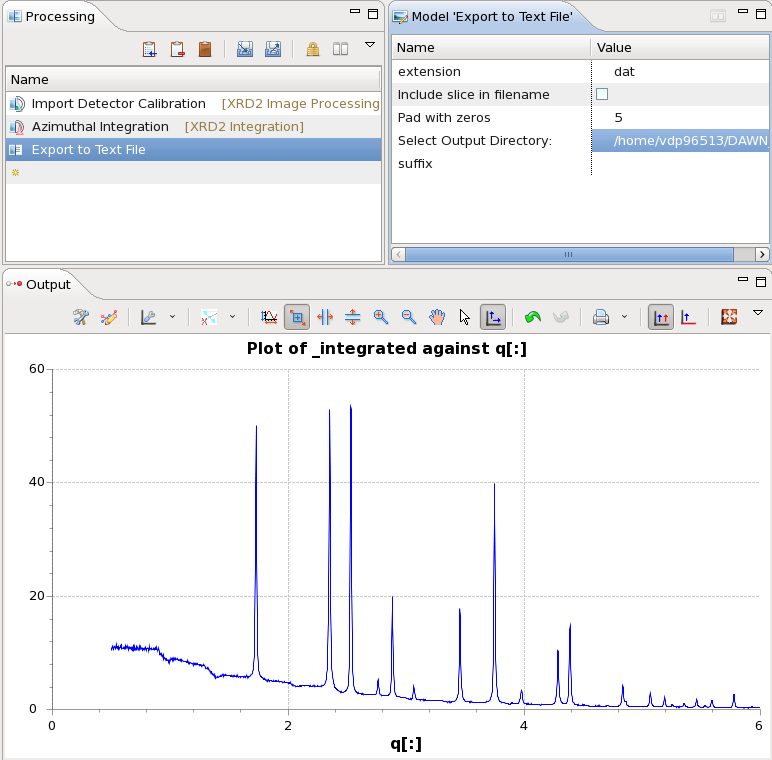
- As a final step, add the Export to Text File step to the processing pipeline and set the Output Directory to where you would like the ASCII data saving
- This processing pipeline can now be run by pressing the green play button on the Data Slice View
- When this button is pressed I dialog appears asking to specify where to save the processed data (processed data is always saved as a NeXus file with a list of all the processing steps that happened)
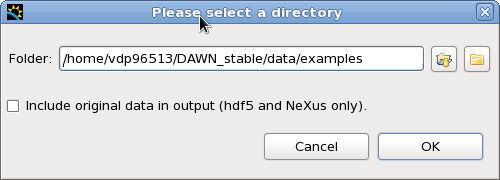
- Select a suitable location and press OK to run the data through the pipeline
- When the progress bar finishes the processed data should be saved in the specified directory (named something like pow_M99S5_1_0001_processed_150317_133936.nxs), the exported text data will also be in its directory (pow_M99S5_1_0001_00000.dat)