TXM user guide: Acquisition
This user guide has several sections and covers all the software required for acquisition: GDA, Hamamatsu HCImageLive and fast analysis using python and Fiji
GDA start-up
Start GDA as you normally would and select your visit.
Execute the gda_startup.py script by using this command in the Jython Console:
>>> execfile('/dls_sw/i13/scripts/Malte/GDA_TXM/gda_startup.py')
This will compile different functions, including TXMtomo
Using HCImageLive
Sample alignment and starting a tomography scan
Pre-alignment
Use the wall-mounted GigE camera (BL13I-OP-FLOAT-02) to pre-centre your sample.
Move the rotation axis to θ = 0° and use the sample_z motor to centre the sample on the crosshair in the camera window.
Move the rotation axis to θ = 90° and use the sample_x motor to centre the sample on the crosshair in the camera window.
Once aligned, you should be able to see it in the HCImageLive application and do the fine centering there.
Fine alignment
To use the HCImageSoftware, you need to use the i13-hamamatsu01 server (left display in the control room). The monitor, keyboard and mouse are connected to the server in the CIA using a KVM-extender.
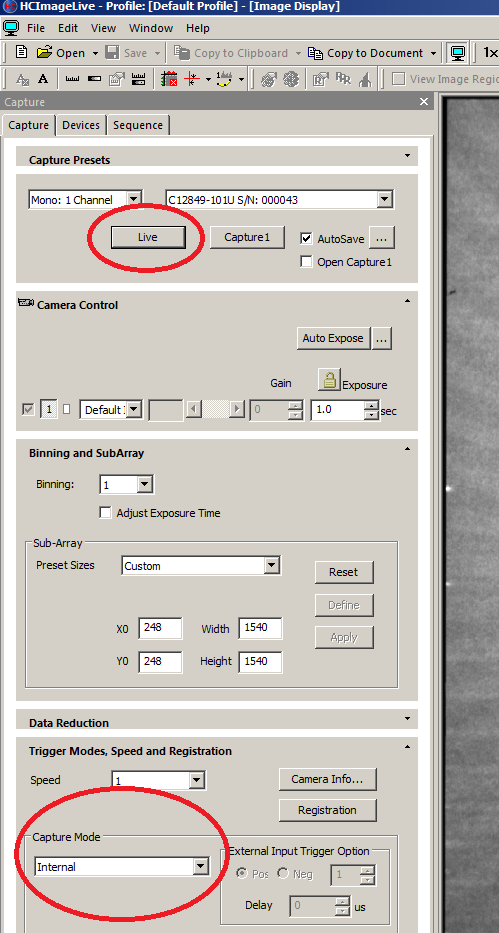
Step 1: Open the Capture tab in the HCImageLive, select Internal as the capture mode and click the Live button. the live view will be started.
Step 2: Using the sample_x at rotation axis θ = 0° and sample_z at rotation axis θ = 90°, centre the sample or the ROI in the field of view.
Preparing a tomography scan in HCImageLive
Step 3: Click the Abort button at the top of the Capture tab and change the capture mode to "External Edge Trigger"
Step 4: Change to the Windows administrator command and create a new directory in the <visitID>/raw/txm-hama folder.
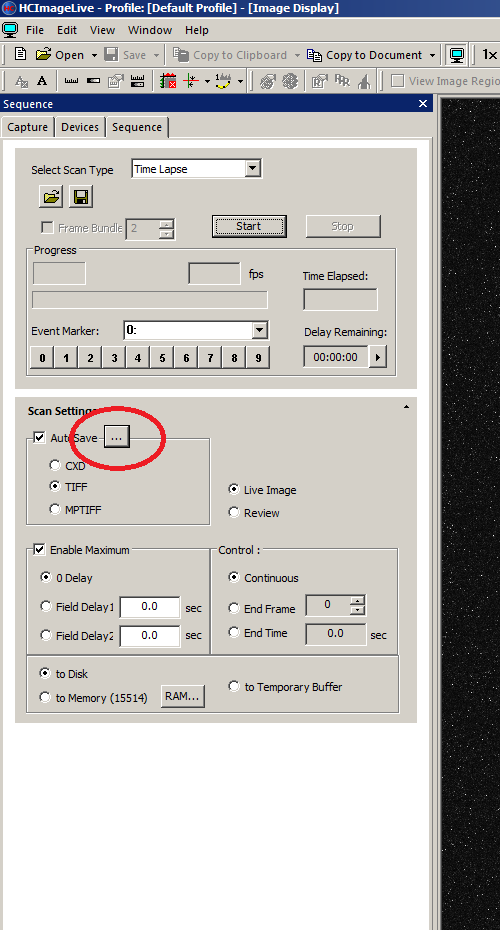
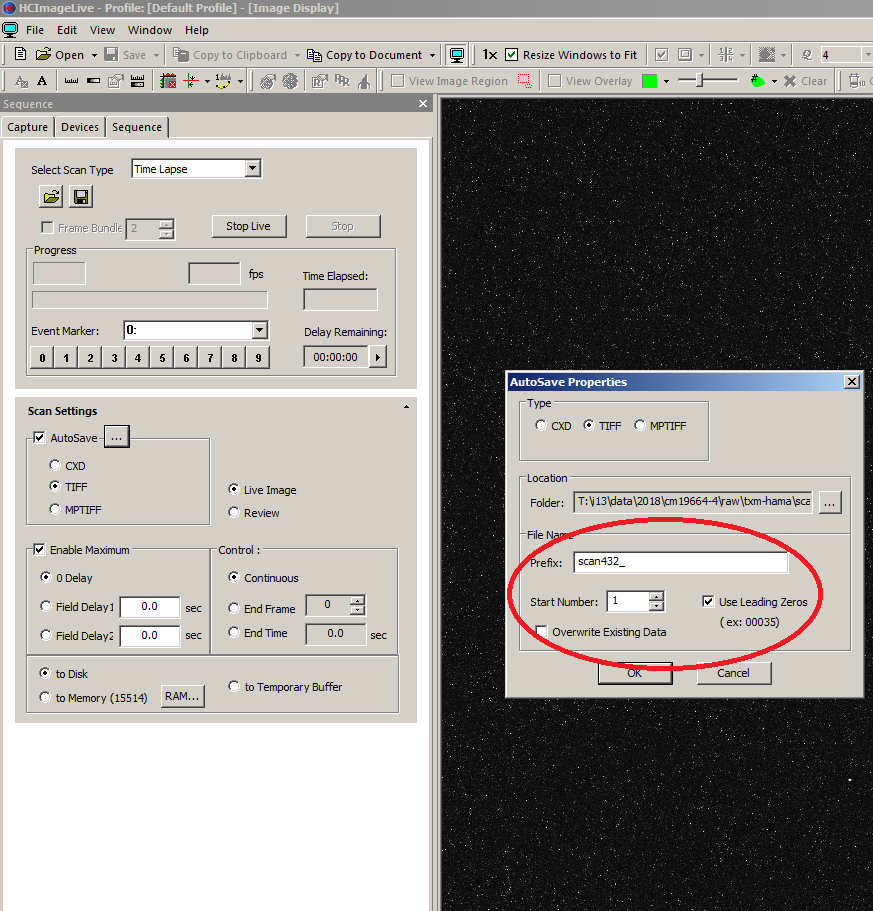
Step 5: Switch to the Sequence tab and click on the AutoSave settings button "...", this will open another window.
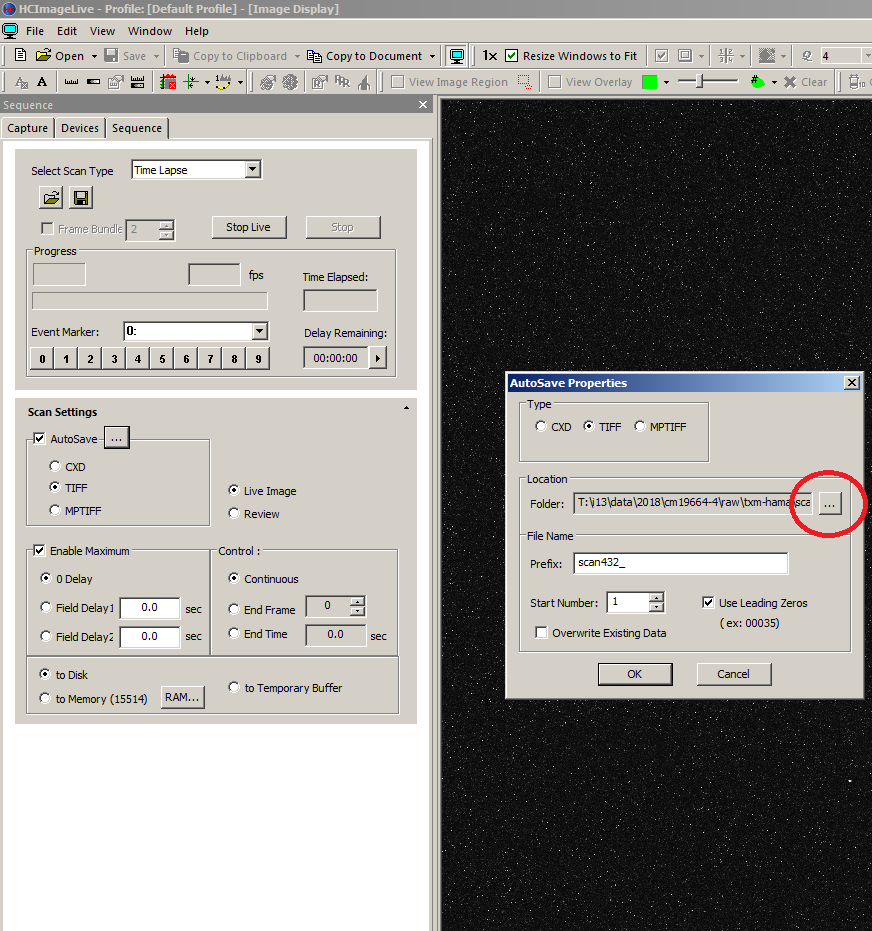
Step 6: In the Autosave properties window, update the Folder by clicking the "..." button, this will open another window.
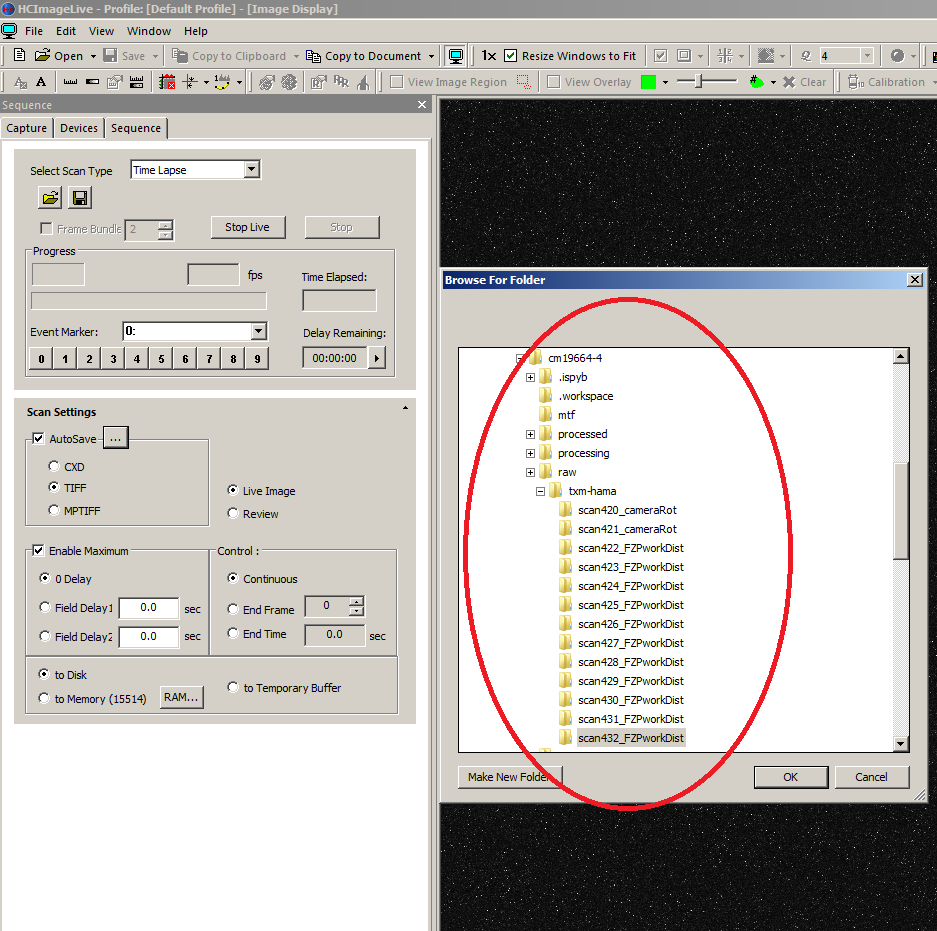
Step 7: Navigate to your newly created folder, select it and click okay.
Step 8: Change the Prefix to correspond with your current scan number and reset the start number to "0". Confirm with clicking the OK button.
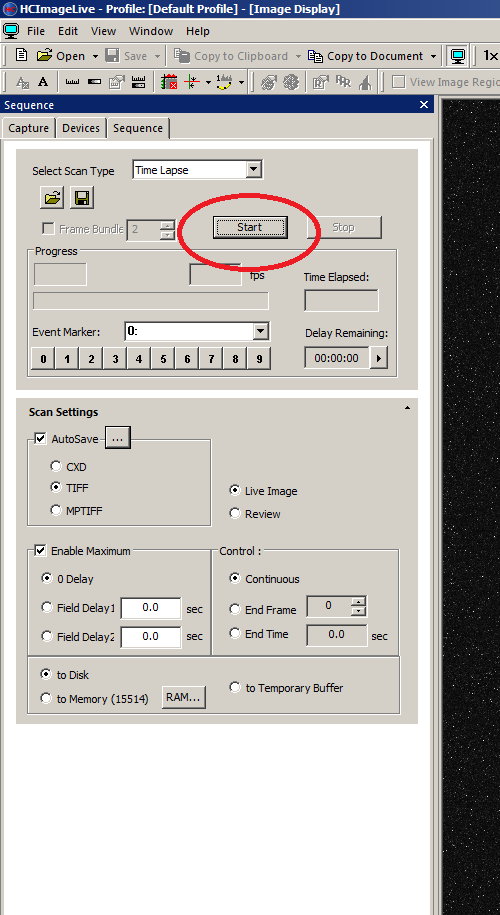
Step 9: Click "Start" at the top of the Sequence tab
| Step 1 | Step 3 | Step 3 | Step 5 |
|---|---|---|---|
|
|
|
|


| Step 6 | Step 7 | Step 8 | Step 9 | |
|---|---|---|---|---|
|
|
|
|
Using Hamamatsu EPICS driver
Starting a live preview using ImageJ
Step 1: start imageJ using this command:
/dls_sw/prod/tools/RHEL6-x86_64/imagej/1-51dls1/prefix/bin/dls-imagej
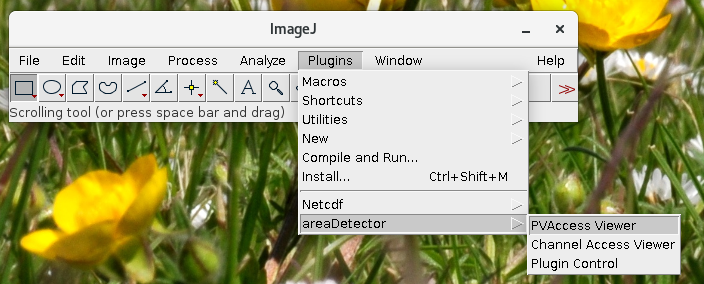
Step 2: Open the PVAccess Viewer plugin
Step 3: change the channel name to
BL13I-EA-DET-04:PVA:Image
Step 4: Click connect and Start
Step 5: In GDA, execute the following command:
>>> startLivePreview()
| Step 2 | Step 3 | |
|---|---|---|
|
|

Starting a tomography flyscan from GDA
Go back to the i13-ws001 computer and use GDA to start the scan. Use the txmFlyTomo command with the scan number (as integer) as the first argument, for example:
>>> txmFlyTomo(1234, nAngles = 1200, tAcq = 0.5)
The txmFlyTomo takes the scan number (in integer form) as first argument, all others arguments are kwargs.
Starting a tomography step scan from GDA
Go back to the i13-ws001 computer and use GDA to start the scan. Use the txmTomo command with the scanname as string, for example:
>>> txmTomo('scan1234', nAngles = 1200, tAcq = 0.5, flatFieldInterval = 1200)
| Parameter | preset | type | used by | description |
|---|---|---|---|---|
| scan number (required) | integer | txmFlyScan | The scan number | |
scanname | string | txmTomo | the name of the logfile to be written. | |
| nAngles | 1200 | integer | txmFlyScan, txmTomo | the number of projection angles to be acquired. |
| tAcq | None | float | txmFlyScan, txmTomo | the exposure time. If <None>, defaults to the tAcq from txmParams |
| tDead | 0.01 | float | txmFlyScan, txmTomo | The deadtime (i.e. detector readout time). Should be at least 10 ms. |
| nDark | 20 | integer | txmFlyScan, txmTomo | the number of dark images to be taken |
| nFlat | 10 | integer | txmFlyScan, txmTomo | the number of flat fields to be acquired for averaging |
| flatsAtEnd | True | boolean | txmFlyScan, txmTomo | select whether flatfields should be taken at the end of the scan, irespective of the flatFieldInterval settings |
| flatFieldAngle | None | float or None | txmFlyScan, txmTomo | select a float value to acquire flatfields always at the specified angular position, select None to ignore |
| flatFieldAxis | y | string | txmFlyScan, txmTomo | select x, y or z for the sample flatfield movement. This will always be the respective ss1_sample axis (smarAct) |
| flatFieldInterval | 1200 | integer | txmTomo | the number of projections to be taken between flatfields |
| sampleOut | None | float or None | txmFlyScan, txmTomo | the sample position for flatfield images (in absolute coordinates). If None, the sample will be moved by -200um from the sample in position |
| sampleIn | None | float or None | txmFlyScan, txmTomo | the sample in position. If None, the current sample position will be used. |
| takeOrientationImages | True | boolean | txmFlyScan, txmTomo | select whether orientation images (at 0°, 90° and 180°) should be acquired for image registration at the start and end of the scan and around flat fields |
| rotationMode | 180 | integer | txmFlyScan, txmTomo | select either 180 or 360° |
| blurCheck | False | boolean | txmFlyScan | the txmFlyScan will always check whether the speed settings allow a reasonably small blurring. If set to <True>, any blurring larger than 1px will abort the scan |