How to perform processing on Linux cluster
All DLS Users have connection privileges to the Linux environment accessed via NX (NoMachine). Here we describe how can one get access to data acquired on e01 / e02 and run a simple python script, saving the outcome on the storage space.
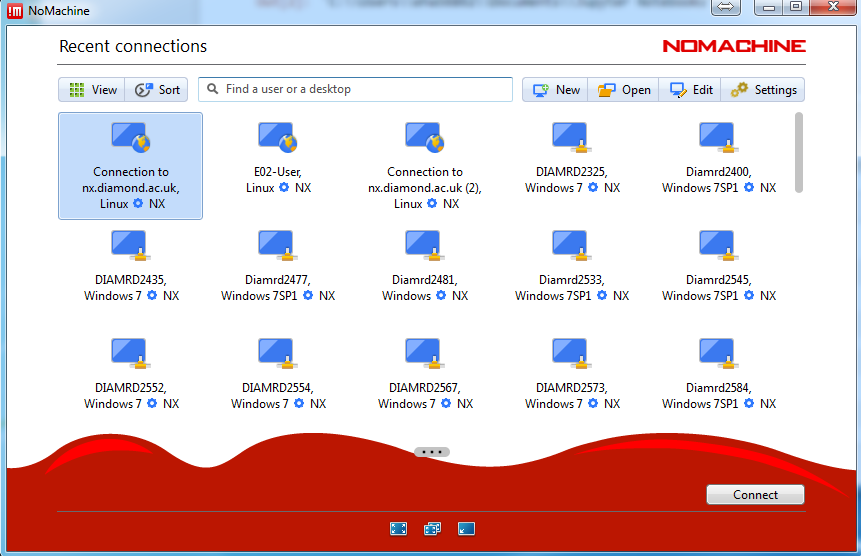
Establish the remote connection via NX (see screenshot, a guide to do this for users is available here). From this connection the data on dls/e01 and dls/e02 storage spaces can be seen.
Each sessiondata folder contains multiple folders. We are currently saving data to the raw folder. This folder is not editable after the session's termination. The processing folder can be edited and is archived on dls server. The tmp folder can also be modified, but its contents get deleted after 3 days and is not archived. It is then recommended to write the outcome of any processing performed here to the "processing" folder.
Right click on Desktop and start a cmd window (Open in Terminal).
Browse to the session data folder of interest, for example:
cd ./data/2017/nt19520-1/processing
Hyperspy is installed on a python 3 environment, so you need to activate this environment to gain access to hyperspy, if needed. For this, run the following:
module load python/ana
source activate python3
start a python file by:
gedit test.py
This would open a new editor with this name. Save it in the current folder.
In order to have access to the cmd window, apply Ctrl+Z in cmd. This would break from the python file and make the cmd window active. now execute > bg. This would run the python editor in the background.
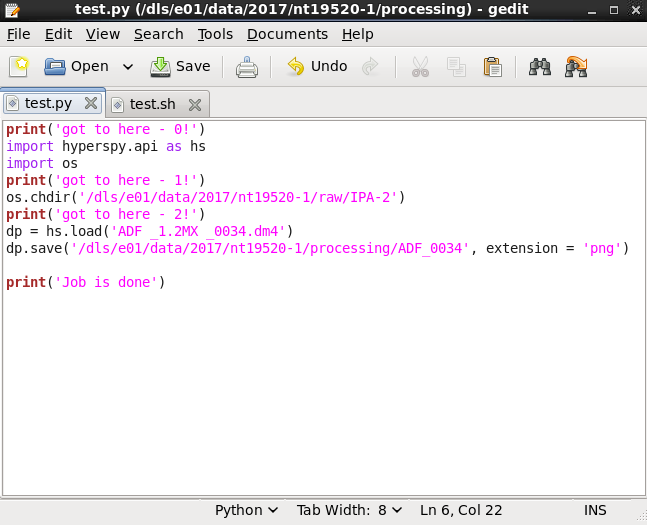
Create a python routine. See example. This small script. loads a .dm4 file from the session data and saves it in the processing folder as a .png image. Couple of print commands to check the progress of the code.
In order to be able to run this python routine on the cluster we need to create a bash file. Firstly we need to load a module as follows:
module load global/cluster
Start another editor file:
gedit test.sh
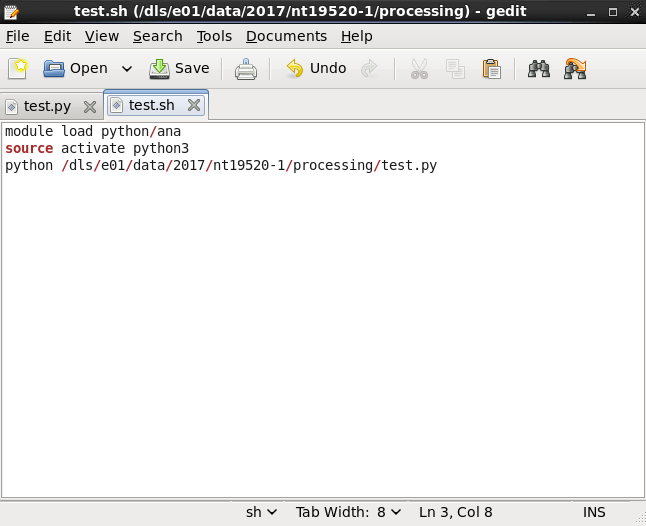
Point to the correct python environment and file as given in the example.
Run the routine by:
qsub test.sh
This submits this job to the cluster with low priority.
In order to send with medium prority change to the following:
qsub -q medium.q test.sh
High priority is reserved for GDA / acquisition jobs.
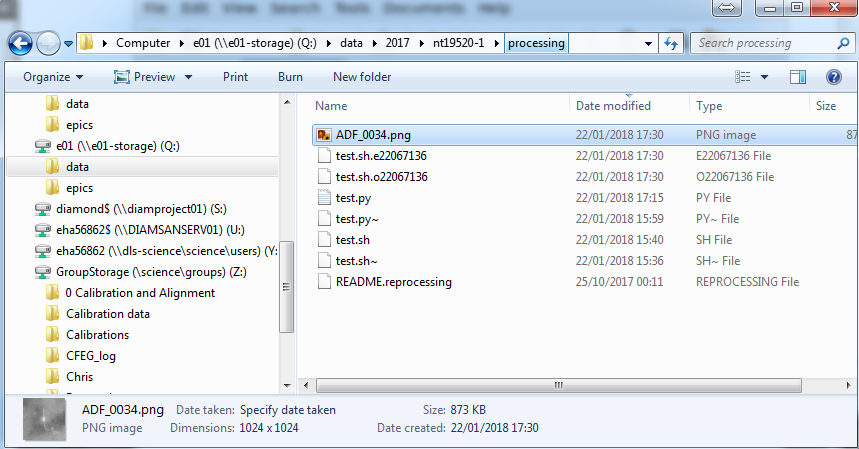
This will send this job to queue. Once executed, in the processing folder we have new files, as can be seen in the example case.
One keeps the potential error messages (test.sh.e) and the other holds the output values (test.sh.o). The .png file is also saved.
The contents of the two files are shown here.


